
Murray Lawn Mower Instruction Manual: A Comprehensive Guide
Welcome! This manual provides detailed guidance for Murray lawn mower owners‚ covering operation‚ maintenance‚ and troubleshooting – based on Consumer Reports testing.
Murray has a long-standing reputation for producing reliable and accessible lawn care equipment‚ serving homeowners for generations. From push mowers to robust riding tractors‚ Murray offers a diverse range of solutions to tackle various lawn sizes and terrains. This instruction manual is designed to be a comprehensive resource‚ ensuring you get the most out of your Murray lawn mower.
Consumer Reports evaluations highlight Murray’s commitment to value‚ often showcasing competitive performance in their testing programs. Understanding your mower’s capabilities and adhering to the guidelines within this manual will contribute to efficient operation and prolonged lifespan. We will cover everything from initial setup and safe operation to routine maintenance and troubleshooting common issues‚ empowering you to maintain a beautifully manicured lawn with ease.
Understanding Your Murray Model
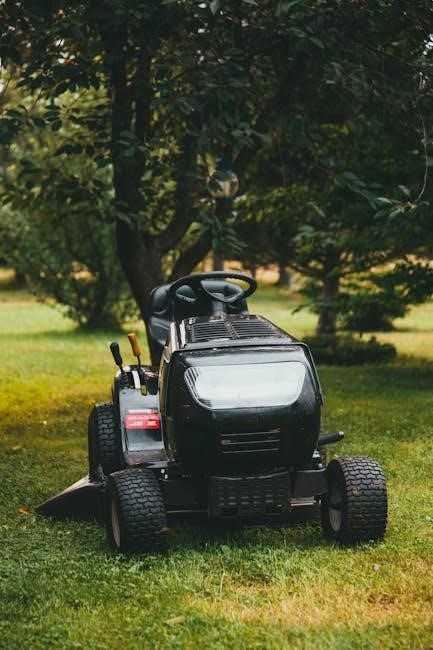
Murray lawn mowers come in a variety of configurations‚ including push mowers‚ self-propelled models‚ and riding tractors like the MT200‚ which Consumer Reports assesses rigorously. Identifying your specific model number is crucial for accessing the correct parts and tailored support. This number is typically located on the mower deck or engine housing – consult your purchase documentation if needed.
Each model boasts unique features and specifications. Familiarize yourself with the controls‚ cutting deck size‚ engine type‚ and any specialized attachments. Understanding these aspects will optimize performance and ensure safe operation. Refer to the diagrams and specifications detailed later in this manual to pinpoint the components specific to your Murray mower. Knowing your model inside and out is the first step to successful lawn care.

Safety Precautions – Before You Start
Prioritize safety! Before operating your Murray lawn mower‚ a thorough safety check is essential. Always wear appropriate safety glasses‚ sturdy footwear‚ and hearing protection. Inspect the mowing area for stones‚ toys‚ or other objects that could become projectiles.

Never allow children or untrained individuals to operate the mower. Ensure the grass catcher is securely attached before starting. Disconnect the spark plug wire (for gas models) or remove the battery (for electric models) during maintenance. Be aware of your surroundings and never mow near bystanders. Following these precautions minimizes risk and ensures a safe mowing experience. Remember‚ responsible operation is paramount.
General Safety Rules
Essential guidelines for safe operation: Always read and understand this manual before using your Murray mower. Keep children and pets well away from the mowing area. Never operate the mower while under the influence of drugs or alcohol. Inspect the mower for damaged parts‚ and never use a mower with faulty components.
Avoid operating on wet or slippery grass. Be cautious when changing direction on slopes. Never pull the mower backward. Always disengage blades before crossing gravel drives or roads. Ensure adequate ventilation when working with gasoline. Store fuel safely‚ away from heat and open flames. Adhering to these rules will significantly reduce the risk of accidents.

Specific Murray Mower Safety Features
Murray prioritizes user safety with integrated features: Many Murray mowers include a blade brake system‚ stopping the blade quickly upon operator release. Look for the safety bail – it must be held down to keep the engine running‚ preventing accidental operation. Some models feature operator presence control (OPC)‚ automatically disengaging the blades if you step away.
Inspect the discharge chute for proper function and ensure it’s securely attached. Be aware of the side discharge deflector‚ preventing objects from being thrown. Regularly check safety decals for visibility and replace if damaged. Familiarize yourself with the location of the emergency stop switch. These features‚ combined with safe practices‚ enhance your mowing experience.
Assembly Instructions
Before beginning‚ ensure the mower is on a level surface and the engine is OFF. Carefully unpack all components‚ verifying against the parts list. Assembly typically involves attaching the handle‚ installing the grass catcher‚ and potentially adding mulch plugs. Refer to the detailed diagrams included in this manual for precise component placement.
Use the provided hardware; do not substitute. Tighten all bolts and screws securely‚ but avoid over-tightening. Proper handle attachment is crucial for control. Ensure the grass catcher frame aligns correctly before snapping it into place. If mulching‚ firmly insert the mulch plugs into the designated discharge opening. Double-check all connections before initial operation.
Attaching the Handle
Begin by locating the handle assembly and the corresponding mounting points on the mower deck. Typically‚ these involve pre-drilled holes and brackets. Align the handle with these points‚ ensuring the control panel faces the operator as intended.
Secure the handle using the provided bolts‚ washers‚ and nuts. Tighten these fasteners gradually in a criss-cross pattern to ensure even pressure and prevent warping. Do not fully tighten until all bolts are in place. Once aligned‚ firmly tighten all hardware. Verify the handle is securely attached and doesn’t wobble before proceeding. A properly attached handle is vital for safe operation and control.
Installing the Grass Catcher
Locate the grass catcher bag and the frame that attaches to the rear of the mower deck. The frame usually slides into designated slots or clips onto mounting points. Ensure the frame is securely locked into position before attaching the bag.
Carefully lift the grass catcher bag and align it with the frame. Most models feature hooks or loops that connect the bag to the frame. Confirm the bag is firmly attached and won’t detach during operation. Regularly check the bag’s connection before each use. A properly installed grass catcher prevents clippings from being discharged back onto the lawn‚ providing a cleaner cut.
Adding Mulch Plugs (If Applicable)
If your Murray mower supports mulching‚ locate the mulch plugs included with your mower. These are typically rubber or plastic pieces designed to block the side discharge chute. Insert the mulch plugs firmly into the discharge opening until they are securely seated.
Ensure both sides are properly plugged for effective mulching. Mulching finely chops grass clippings and returns them to the lawn as fertilizer. This promotes healthier growth and reduces the need for chemical fertilizers. Regularly inspect the mulch plugs for wear and tear‚ replacing them as needed to maintain optimal mulching performance. Proper installation is key for efficient operation.
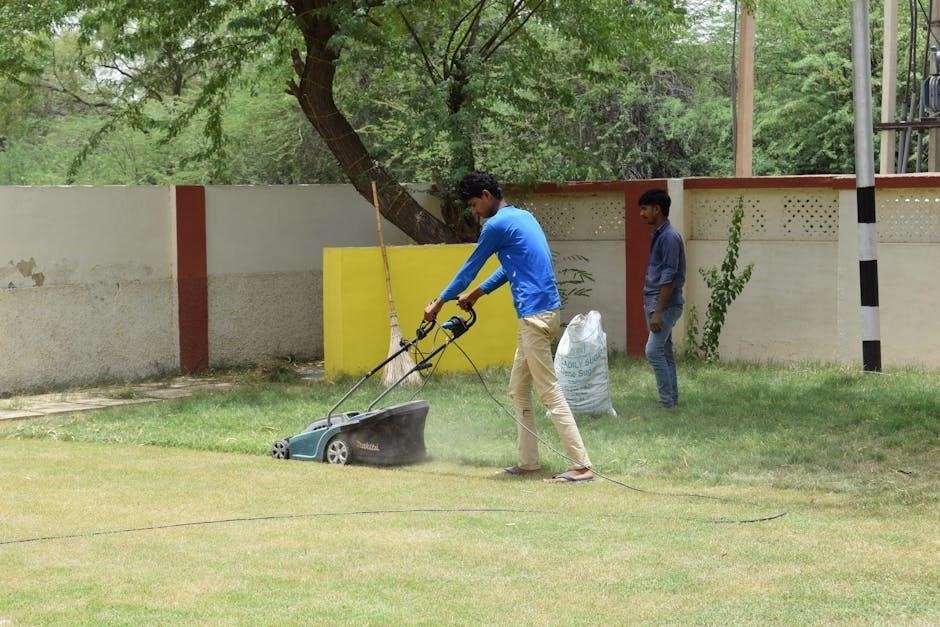
Operating Your Murray Lawn Mower
Before each use‚ visually inspect the lawn and remove any debris that could be hazardous. Ensure the grass catcher is properly attached‚ or mulch plugs are securely in place if utilizing that function. Familiarize yourself with all controls – blade engagement‚ speed settings‚ and steering mechanisms.
Always start the mower on a level surface. Follow the specific starting procedures for cold or warm starts (detailed in subsequent sections). Maintain a safe operating speed‚ avoiding sudden turns or stops. Be mindful of bystanders‚ pets‚ and obstacles while mowing. Never operate the mower under the influence of drugs or alcohol.
Starting the Engine – Cold Start
For a cold start‚ ensure the fuel valve is open and the choke is engaged. This enriches the fuel mixture for easier ignition in cooler temperatures. Prime the engine by pressing the primer bulb several times – typically 3-5 pumps – until fuel is visible. Firmly hold the safety bail and pull the starter rope with a smooth‚ deliberate motion.
Avoid reeling the rope out completely. If the engine doesn’t start after a few attempts‚ re-prime and try again. Once the engine sputters‚ gradually disengage the choke to allow for a smoother transition to running speed. Always maintain a firm grip on the safety bail during operation.
Starting the Engine – Warm Start
When starting a warm engine‚ the procedure differs slightly from a cold start. Typically‚ the choke should not be engaged‚ as the engine retains some residual heat and fuel. Ensure the fuel valve remains open and firmly hold the safety bail. Pull the starter rope with a smooth‚ consistent motion – less force is usually required compared to a cold start.
Avoid excessive priming‚ as this can flood the engine. If the engine hesitates‚ a single‚ brief prime may be helpful. Listen for the engine to catch and run smoothly. If it fails to start after a few attempts‚ briefly engage the choke and try again‚ then disengage it immediately. Always prioritize safety and maintain control.
Adjusting Cutting Height
Murray lawn mowers feature adjustable cutting heights to accommodate varying grass lengths and preferences. Typically‚ height adjustment is controlled by levers located near each wheel. These levers lock into pre-set positions‚ determining the distance between the blade and the ground.
To raise the cutting height‚ move the levers towards the higher numbered settings. Conversely‚ lowering the height involves moving them towards lower numbers. Ensure all four wheels are adjusted to the same height for an even cut. Regularly check the adjustment settings‚ especially after encountering uneven terrain. A higher cut is recommended for longer grass‚ while a lower cut suits well-maintained lawns.
Mowing Techniques for Optimal Results

Achieving a beautifully manicured lawn with your Murray mower requires employing effective mowing techniques. Overlap each mowing pass by a few inches to prevent scalping and ensure a consistent cut. Vary your mowing pattern with each session – alternating directions promotes healthy grass growth and prevents soil compaction.
Avoid mowing wet grass‚ as it can clog the deck and lead to an uneven finish. Maintain a moderate mowing speed; rushing can compromise cut quality. For exceptionally tall grass‚ raise the cutting height initially and gradually lower it over subsequent mowings. Regular mowing encourages denser growth and a healthier‚ more vibrant lawn.
Maintenance & Upkeep
Consistent maintenance is crucial for extending the life and performance of your Murray lawn mower. Regular upkeep prevents costly repairs and ensures optimal cutting efficiency. Prioritize checking the oil level before each use‚ and change the oil according to the manufacturer’s recommendations – typically after every 25 hours of operation or annually.
Sharpening the blade is essential for a clean cut; a dull blade tears the grass‚ leading to brown tips and increased susceptibility to disease. Clean the mower deck after each use to remove grass clippings and debris‚ preventing corrosion. Inspect belts and pulleys for wear and tear‚ replacing them as needed.
Checking the Oil Level
Maintaining the correct oil level is paramount for engine longevity. Before each mowing session‚ and at least monthly‚ verify the oil level. Park the mower on a level surface and allow the engine to cool for several minutes. Locate the oil dipstick – typically marked with a yellow or orange handle.
Remove the dipstick‚ wipe it clean with a lint-free cloth‚ reinsert it fully‚ and then remove it again to check the oil level. The oil should be between the “Add” and “Full” marks. If low‚ carefully add the recommended oil type (refer to your owner’s manual) until the “Full” mark is reached. Avoid overfilling!
Changing the Oil
Regular oil changes are crucial for maintaining optimal engine performance. It’s recommended to change the oil after every 25 hours of operation‚ or at least once per season. Warm up the engine for a few minutes to help the oil flow more freely. Position an approved oil drain pan beneath the oil drain plug.
Remove the drain plug and allow all the old oil to drain completely; Once drained‚ reinstall the plug securely. Locate the oil fill cap and add the recommended amount of fresh oil (refer to your owner’s manual for the correct type and quantity). Check the oil level with the dipstick and adjust as needed. Properly dispose of the used oil at a recycling center.
Sharpening the Blade
A sharp blade ensures a clean cut and healthy lawn. Dull blades tear the grass‚ leading to brown tips and increased disease susceptibility. Disconnect the spark plug wire for safety before working on the blade. Securely remove the blade using a wrench and socket.

Use a metal file or a blade sharpening tool to sharpen the cutting edges‚ maintaining the original angle. Ensure both blades are sharpened equally for balanced operation. Check the blade for damage – cracks or significant bends require replacement. Reinstall the blade‚ tightening it to the manufacturer’s specified torque. Reconnect the spark plug wire before operating.
Cleaning the Mower Deck
Regular cleaning prevents rust and ensures optimal performance. After each use‚ disconnect the spark plug wire for safety. Carefully scrape away accumulated grass clippings and debris from the underside of the mower deck using a scraper or putty knife.
Avoid using a water hose directly‚ as it can damage electrical components. Instead‚ use a garden hose with a gentle spray nozzle. For stubborn buildup‚ a specialized mower deck cleaner can be applied‚ following the product instructions. Inspect the deck for any damage‚ such as cracks or rust‚ and address them promptly. Allow the deck to dry completely before storing or operating the mower.
Troubleshooting Common Issues
Encountering problems? This section addresses frequent issues. If your mower won’t start‚ check the fuel level‚ spark plug‚ and ensure the safety interlock is engaged. An uneven cut often indicates a dull blade – sharpen or replace it. Excessive smoke could signal an oil leak or a fuel mixture problem; investigate immediately.
Blade engagement problems might stem from a worn belt or a faulty engagement cable. Always disconnect the spark plug before inspecting the blade or underneath the deck. If issues persist‚ consult a qualified service technician. Remember to review the safety precautions before attempting any repairs.
Mower Won’t Start
Frustrated with a non-starting mower? First‚ verify sufficient fuel in the tank and ensure the fuel shut-off valve is open. Check the spark plug – is it clean and properly gapped? A fouled plug prevents ignition. Confirm the spark plug wire is securely connected. Next‚ examine the safety interlock system; it must be fully engaged for the mower to start.
If these steps fail‚ inspect the air filter for obstructions. A clogged filter restricts airflow. Finally‚ test the starter rope or electric start system (if equipped). If problems persist‚ professional diagnosis is recommended. Always disconnect the spark plug before any inspection!
Uneven Cut
Experiencing an uneven cut? Several factors could be at play. Begin by checking the tire pressure; uneven inflation leads to an inconsistent deck height. Ensure the blade is sharp and properly balanced – a dull or unbalanced blade tears grass instead of cutting cleanly. Verify the cutting height is appropriately set for your lawn conditions.
Also‚ inspect the mower deck for any accumulated grass clippings or debris‚ as these can obstruct airflow and affect cutting performance. Overlapping mowing passes slightly can help achieve a more uniform result. Finally‚ consider mowing speed; moving too quickly can compromise the cut quality.
Excessive Smoke
Noticing excessive smoke from your Murray mower? This often indicates an issue with the engine’s oil or fuel system. Blue smoke typically signals oil entering the combustion chamber – check the oil level and for potential leaks. Black smoke suggests a rich fuel mixture‚ possibly due to a clogged air filter or carburetor problems.
White smoke could indicate water or coolant entering the engine‚ a more serious concern requiring professional attention. Always ensure you’re using the correct type of oil and that the air filter is clean. If the smoking persists after these checks‚ discontinue use and consult a qualified mechanic for diagnosis and repair.
Blade Engagement Problems
Experiencing difficulty engaging the blade on your Murray mower? First‚ ensure the blade control lever is fully depressed and locked into position. A common cause is a worn or broken blade engagement cable – inspect it for damage and replace if necessary. Check the belt that connects the engine to the blade; a loose or damaged belt won’t transfer power effectively.
Also‚ verify the blade spindle isn’t seized or obstructed. If the issue persists‚ there might be a problem with the internal transmission. Disconnect the spark plug before inspecting the blade or belt to prevent accidental starting. For complex repairs‚ consult a qualified service technician.
Parts & Diagrams
Need to replace a worn or damaged part on your Murray lawn mower? Accessing the correct parts and understanding diagrams is crucial for successful repairs. Murray parts can often be located through authorized Murray dealers‚ online parts retailers specializing in lawn mower components‚ and sometimes directly through the manufacturer’s website.
When ordering‚ always have your mower’s model number readily available to ensure compatibility. Parts diagrams‚ typically found in this manual or online‚ visually illustrate the mower’s components and their relationships. These diagrams are invaluable for identifying the correct part number and understanding how it fits within the assembly.
Locating Replacement Parts
Finding the right replacement parts for your Murray mower is straightforward. Begin by consulting your mower’s model number – this is essential for accurate ordering. Authorized Murray dealers are a reliable source‚ offering genuine Murray parts and expert advice. Numerous online retailers specialize in lawn mower parts‚ providing a broad selection and competitive pricing.
Websites like Partstree.com and others often host detailed parts diagrams searchable by model number. Always double-check compatibility before purchasing. When ordering online‚ verify the retailer’s return policy in case of errors. Keep a record of your purchases‚ including part numbers and dates‚ for future reference and warranty claims.

Understanding the Parts Diagram
Murray parts diagrams are visual guides crucial for identifying components. Each diagram illustrates an exploded view of the mower‚ showcasing how parts fit together. Parts are typically numbered‚ with a corresponding parts list detailing descriptions and part numbers. Familiarize yourself with key sections like the engine‚ deck‚ and drive system.
Pay close attention to detail – slight variations in diagrams can indicate different versions of a part. Use the diagram in conjunction with your mower’s model number to ensure accuracy. Online parts retailers often provide interactive diagrams‚ allowing you to click on parts for more information. Understanding these diagrams empowers you to confidently order the correct replacements.

Winter Storage
Proper winter storage safeguards your Murray mower against damage during the off-season. Begin by thoroughly cleaning the mower deck‚ removing grass clippings and debris. Stabilize the fuel with a fuel stabilizer to prevent gumming and corrosion within the fuel system. Drain or stabilize the fuel‚ following manufacturer’s recommendations.
Disconnect the spark plug wire (gas models) or remove the battery (electric start). Check and change the oil before storage‚ ensuring fresh oil protects internal components. Store the mower in a dry‚ sheltered location‚ covered to protect against dust and moisture. For electric models‚ follow specific battery care instructions to maintain its charge and longevity.
Preparing Your Mower for Winter
Thorough preparation is key to a successful winter storage period. Start with a comprehensive cleaning‚ removing all accumulated grass‚ leaves‚ and dirt from the mower deck and around the engine. Drain the fuel tank completely‚ or add a fuel stabilizer to prevent fuel degradation and carburetor issues.
Change the engine oil to remove contaminants accumulated during the mowing season. Inspect belts and blades for wear and tear‚ replacing them if necessary. Disconnect the spark plug wire for gasoline models to prevent accidental starting. Clean the air filter and store it with the mower. Finally‚ cover the mower with a breathable tarp to protect it from dust and moisture.
Battery Care (For Electric Start Models)
Proper battery maintenance is crucial for reliable electric start functionality. Before storing your Murray mower for the winter‚ fully charge the battery. If possible‚ remove the battery from the mower and store it indoors in a cool‚ dry place – avoiding freezing temperatures which can significantly reduce battery life.
Periodically check the battery’s charge level throughout the off-season‚ using a battery tender or charger to maintain a full charge. Clean the battery terminals with a wire brush to remove any corrosion. Inspect the battery cables for damage and replace if needed. Reinstall the battery in the spring and test the electric start before your first mow.
No Responses